
Skip to content
Woodworking.Monster September 20, 2026
Home
Woodworking.Monster
  • Privacy Policy
  • Terms of Use
  • Welcome to Woodworking Monster
Kerfing

Kerfing Project Notebook: A Test-Piece Worksheet

Published September 19, 2026 · 2 min read
· By admin

A successful test piece is much more useful when you can repeat it. Use this notebook page alongside your kerfing videos to record what you tried, what happened and what you want to change. It is an original planning worksheet for Riches Projects, not a tested construction plan.

1. Write the goal before choosing settings

Name the part you want to make: for example, a decorative curved front or a small practice panel. Sketch its position in the finished project. Mark the visible face and label every dimension with its unit. Add a short sentence describing what a successful sample should look like.

Keep unanswered questions visible. If you have not chosen the material, curve or support, write “not decided” instead of filling the space with a guess.

2. Give each sample an identity

Label samples A, B and C. In your notebook, record the date, material source, measured thickness and the tool setup you used. Note the cut spacing and the remaining material beneath the cuts. Take a photograph beside the label after the saw is stopped and the sample is safely removed.

Sample One change tested Result Next decision
A Starting setup Record observations Keep or revise
B Describe one adjustment Compare with A Keep or revise
C Repeat the preferred setup Was it repeatable? Ready for planning?

3. Describe the result plainly

Use observations such as “gap at the middle of the form,” “visible ridges in the curve,” or “outer face cracked near one end.” These notes are more useful than simply writing “bad.” Do not carry a failed sample forward as if it passed. Record what you will investigate before making another.

4. Make a separate assembly checklist

Before working on the final part, list the form or frame, permanent support, clamps, adhesive instructions, edge treatment and finish. Add any manufacturer guidance you need to review. Keep the material purchase list separate from the cutting notes so you can revise one without losing the other.

5. Save the reference that helped

Record the tutorial title and a timestamp beside each observation you want to revisit. Keep the best physical sample and a photo of its label. Next time, begin by comparing the new material with that sample rather than assuming the old settings will transfer unchanged.

Read Kerfing Basics · Watch the coat-rack project · Watch the WOOD magazine tutorial

Return to Riches Projects → Kerfing

Filed under: Kerfing, Riches Projects

Post navigation

Previous: Kerfing Basics: Plan a Curved Wood Panel

More from Kerfing

Kerfing

Kerfing Basics: Plan a Curved Wood Panel

Published September 19, 2026 · 2 min read
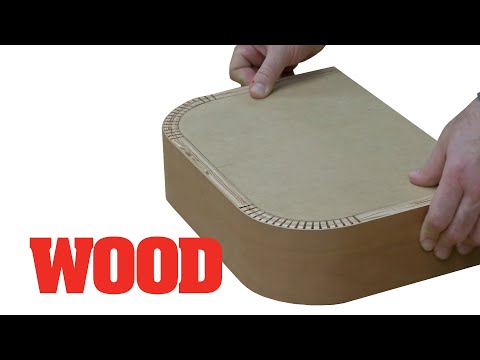
How To Kerf Bend Wood - WOOD magazine — WOOD magazine
Kerfing

How to Kerf Bend Wood: Full WOOD Magazine Tutorial

Published September 19, 2026 · 1 min read
How to Quickly Kerf Bend Plywood and Solid Wood | Woodworking Coat Rack Project — Make Something
Kerfing

Kerf Bending Plywood and Solid Wood: Full Coat Rack Video

Published September 19, 2026 · 1 min read

Leave a Reply Cancel reply

Your email address will not be published. Required fields are marked *

Search

Recent Posts
  • Kerfing Project Notebook: A Test-Piece Worksheet
  • Kerfing Basics: Plan a Curved Wood Panel
  • How to Kerf Bend Wood: Full WOOD Magazine Tutorial
  • Kerf Bending Plywood and Solid Wood: Full Coat Rack Video
  • The Splinter Report: September 18th
  • I Can’t Believe RYOBI Hid This From Us… #tools
  • Turning Bowls Little Bit Differently
  • My Old Table Saw Is Better Than My SawStop… Except for One Thing | Woodworking Morning Show
  • Loud By Design
  • I Can’t Believe Lowe’s is giving away FREE tools! #tools
Categories
  • Epoxy (25)
  • Finishes & Wood Care (67)
    • Oils (2)
    • Protection (2)
  • Riches Projects (4)
    • Kerfing (4)
  • Skills & Techniques (129)
    • Carving (10)
    • Cutting (1)
    • Joinery (17)
    • Sanding (6)
  • Tools & Equipment (142)
    • Accessories (7)
    • Hand Tools (27)
    • Power Tools (19)
  • Wood & Lumber (89)
    • Plywood (2)
    • Wood Types (28)
  • Woodworking Projects (206)
    • Furniture (49)
    • Lathe Projects (72)
    • Other Builds (1)
    • Shelves (2)
  • Workshop & Safety (121)
    • Dust Collection (2)
    • Safe Working (35)
    • Workshop Setup (9)

Recent Comments

  • Kerfing Project Notebook: A Test-Piece Worksheet - Woodworking.Monster on Kerfing Basics: Plan a Curved Wood Panel
  • Kerfing Basics: Plan a Curved Wood Panel - Woodworking.Monster on How to Kerf Bend Wood: Full WOOD Magazine Tutorial
Archives
  • September 2026 (145)
  • August 2026 (86)
  • July 2026 (35)
  • June 2026 (34)
  • May 2026 (19)
  • April 2026 (23)
  • March 2026 (14)
  • February 2026 (12)
  • January 2026 (10)
  • December 2025 (7)
  • November 2025 (4)
  • October 2025 (1)

Woodworking.Monster is a service of Thirstier, a DBA of Immix Tachyon Synergy Network LLC.

© 2026 Thirstier. Thirstier Theme is an original theme from Thirstier.